
By Laura Mack
April 8, 2016
Yes, Virginia, it’s true — there is such a thing as delicious low carb pizza! These crispy, thin-crust personal pizzas with your favorite cheese and toppings really deliver on taste and texture. The partially-cooked crusts can even be made ahead, topped to order straight from the refrigerator or freezer, and baked off for piping hot, melty goodness in less than 15 minutes. It’s a dream-come-true: low carb pizza that the whole family will love.
After more than a year of low carb eating and trying various low carb “pizza” recipes, I had just about given up. I’ll admit that there are recipes that give you the flavors of pizza on various “crust” delivery systems: sauce, cheese, and toppings on vegetable bases (zucchini, eggplant, etc.), meat bases (‘meatzas’), and assorted other low carb crust attempts. It was after the cauliflower crust experiment that I threw in the towel and resigned myself to a life without pizza. No offense to anyone out there who likes cauliflower crust, but all I can say is “ick!”
If you’ve been a low carb cook for long, you’ve probably seen the “Fathead Pizza” recipe (or variations thereof) online. I eventually did as well, but the recipe features such a strange assortment of ingredients that I had to wonder how it could possibly work and actually taste good. I was more than a little skeptical the first time I made it. Well, to my surprise, it was pretty darned tasty. It didn’t fall apart, and it didn’t taste funky, either.
There were a few things I would change, but that’s what good cooks do — we put our own spin on things! After trying several variations, I came up with my own adaptation of a recipe from Kim of LowCarbMaven.com. Kim changed up the proportions of the original recipe and added whey protein powder (or oat fiber) to give the crust a more bread-like texture. I had also seen recipes that used psyllium husk powder.
After some experimentation, I ended up changing the proportions a bit from Kim’s recipe and added psyllium husk powder to the protein powder, along with some other seasonings. So, if the original recipe didn’t have enough strange ingredients, I’ve added a few more! But I’m quite pleased with the flavor and texture, so it’s worth a few more ingredients to me. Of course, the crust doesn’t have the chewy texture and yeasty flavor of a well-made wheat flour pizza, but it’s more than respectable.

I also found the original fathead pizza dough a little fussy to work with. It has a greater proportion of mozzarella cheese, so as the dough cools down, it starts to harden and become difficult to work with. You can pop it back in the microwave periodically to soften it, but it’s a bit of a hassle. My version stays completely pliable and easy to shape, so there’s no rushing or re-microwaving needed.
The other thing that’s a little different about my recipe is that I make the dough into individual 6″ personal pizza size. I do this because I’m the only person in my house interested in low carb pizza and I don’t care for leftover, reheated pizza.
Homemade personal-size pizza isn’t a new concept for me. I’ve been making it for years, both in the oven as well as on the grill. A number of years ago, I was the pastry chef for an upscale bistro, in charge of all the bread and pizza crusts, as well as the desserts. One of the most popular items on the menu was a personal pizza special that featured different toppings each day. I prepared the dough bases and partially cooked (‘par-cooked’) them on the grill for a smoky flavor and grill marks. They were then chilled down, wrapped, and frozen. When the cooks on the line received a pizza order, they would grab one of the frozen crusts, top it, and put it in the screamin’ hot pizza oven. Handcrafted and ready in a matter of minutes.
As I’m writing this, I’m wondering why I haven’t tried the low carb version on the grill. I’ll have to do that soon and report back to you.

At any rate, let me point out that although these crusts may seem small, they are loaded with protein and fat. Just the crust contains over 12 grams of protein, which is the equivalent of nearly two ounces of chicken or beef. They really fill you up and keep you feeling full for a long time. Unlike pizza made with grain flours like wheat (or gluten-free flours like rice, corn, and tapioca), they don’t spike your blood glucose and have you looking for a snack two hours later. My husband, Dale, is a skinny guy. He’s never eaten a ton of food, but when it comes to pizza, his stomach capacity seems to double. The man can seriously chow down on pizza. I guarantee that he would never be able to eat a similar quantity of this low carb pizza.
These low carb pizzas really are family-friendly. First, they can be customized to each person’s individual tastes. No more whining about ingredients they don’t like. (Yes, Dale, I’m talking to you.) Second, the dough is so forgiving and easy to shape, the kids can even pat out their own crusts and add their own toppings. Third, unlike “real” pizza, these are actually healthy! Add a salad and it’s a perfectly balanced meal.
For toppings, you’re limited only by your imagination. I found that for each 6″ crust, the following proportions seemed to work well:
- 1 1/2 tablespoons of sauce (marinara, pesto, BBQ, salsa, etc.)
- 1 ounce (1/4 cup) of shredded cheese — choose anyone you like that melts well
- 2 ounces or so of protein and/or veggies
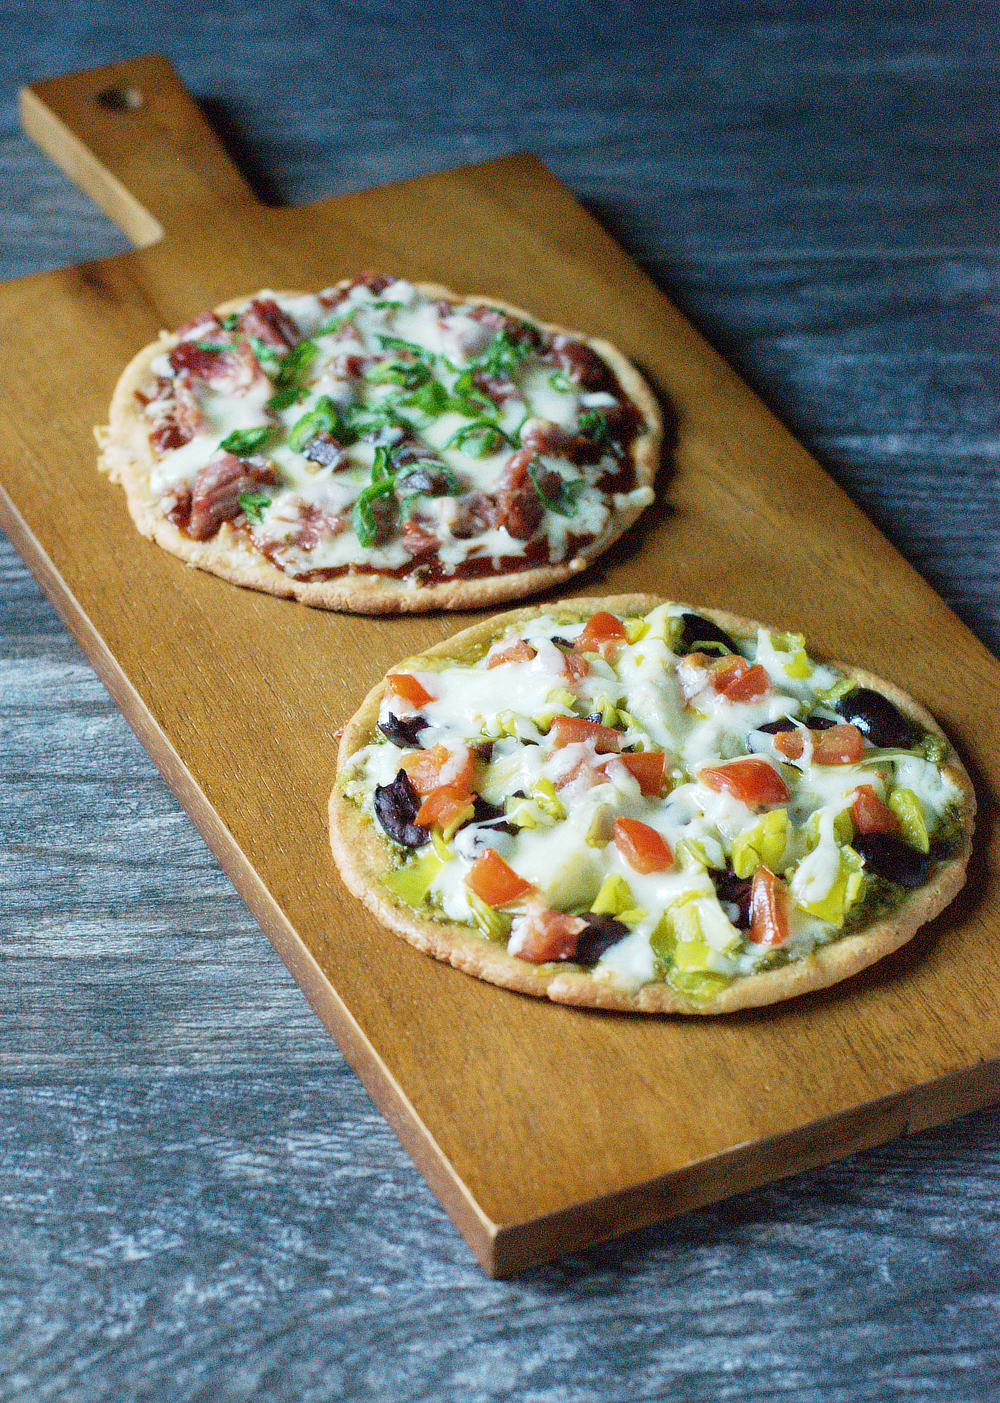
Two of my favorite pizzas are the ones featured in the photos:
- Italian Veggie: pesto sauce, whole milk mozzarella cheese, and about 1/2 ounce each of artichoke hearts, tomato, kalamata olives, and pepperoncini.
- BBQ Pork: low carb BBQ sauce (my recipe is coming next week), 1 1/2 ounces smoked shredded pork (I use the Kirkland brand from Costco), pepper jack cheese, and a couple of teaspoons of green onions.

I thoroughly enjoyed tasting my photo props! I couldn’t decide which one I liked better because they were both so delicious. Next time, I’m going to double the dough recipe and make 12 pizza crusts for the freezer. They’re the perfect size to bake off in my toaster oven. It’s hard to beat homemade low carb pizza in less than 15 minutes!
Seriously, it’s past time for you to have some yummy low carb pizza. Don’t be intimidated by this goofy recipe, because it’s really not difficult — just give it a whirl. I can’t wait to hear what some of your favorite combinations of toppings are! As always, let me know if you have any questions.
Thin-Crust Personal Pizzas — Low Carb
Author: Laura Mack
Recipe type: Main
Prep time: 20 mins
Cook time: 30 mins
Total time: 50 mins
Serves: 6

These crispy thin-crust personal pizzas with your favorite melty cheese and toppings really deliver on taste and texture. The partially-cooked crusts can even be made ahead, topped to order straight from the refrigerator or freezer, and baked off for piping hot, melty goodness in less than 15 minutes.
Ingredients
Pizza Crusts
4 ounces (1 cup) almond flour
2 tablespoons / 10 grams whey protein powder, unflavored
1 tablespoon / 5 grams psyllium husk powder
½ teaspoon dried oregano
¼ teaspoon garlic powder
5 ounces (1¼ cups) shredded whole-milk mozzarella cheese
2 ounces cream cheese, full-fat, cut into 8 pieces
1 large egg, lightly beaten with a fork
--
Toppings
Per individual crust:
1½ tablespoons sauce (marinara, pesto, BBQ, salsa, etc.)
1 ounce / ¼ cup shredded cheese -- choose any one you like that melts well
2 ounces or so of protein and/or veggies
Instructions
- Preheat oven to 400F. Prepare 6 pieces of parchment paper at least 6" x 6". I cut half-sheet size (24" x 16") parchment into fourths to get pieces that are 8" x 6".
- Place dry ingredients in a small bowl. Whisk to blend and to break up any lumps in the almond flour. Set aside.
- Place shredded mozzarella and cream cheese pieces in a medium microwave-safe bowl. Microwave at full power until cheeses are melted, 1½ to 2 minutes.
- Add beaten egg about a ⅓ at a time, whisking vigorously with a fork into cheese mixture until incorporated. Stir in dry ingredients with a silicone spatula or wooden spoon until well blended. Set aside and let the dough cool for about 5 minutes.
- Working with one dough ball at a time, place on a sheet of the small prepared parchment and cover with a piece of similarly-sized plastic film. Using the palm of your hand, press out the dough into an even disc about 6" diameter. Turning the parchment a quarter-turn repeatedly as you press out the dough will help keep it even. If the disc becomes off-center on the parchment, peel off the parchment and re-center the disc. Set aside. Repeat until you have 6 discs of dough. I use a new piece of plastic film for each one so that I can leave each disc covered with plastic while I'm working on the remainder.
- Place 4 discs (still on their parchment paper) on a half-size sheet pan and remove the plastic film. Using a fork, poke holes in the bottom of each disc 5 or 6 times to help prevent puffing up while baking. (This is called "docking" in the bakery business.)
- Place the sheet pan on the middle rack of the oven and bake for 5 minutes. Rotate pan and bake until tops are pale golden about another 4-5 minutes. (This is just partial baking; it will finish cooking when the pizzas are topped and baked.) Remove pan from oven and let cool for 5 minutes before transferring crusts onto a wire rack to finish cooling. Place the remaining two discs on the sheet pan (careful, the pan may still be hot) and repeat par-baking.
- When ready to add toppings, place a crust with the lightest side facing up on the small piece of parchment paper. Add toppings as desired; I spread the sauce first, followed by half the cheese, then the meats and/or veggies, and finally the rest of the cheese. Bake on a sheet pan on the bottom rack of a preheated 425F oven. After 5 minutes, rotate the pan. Bake for another 3-5 minutes until the cheese is melted. I check the pizzas after 3 minutes because the crust can over-brown quickly due to the almond flour. Remove from oven and let sit for 5 minutes for the cheese to set slightly. Slice into quarters and serve.
- To make crusts ahead, let crusts cool completely at room temperature. Layer crusts with parchment in between and place in a freezer zip-top bag. Place in the refrigerator for up to 5 days or freeze for up to 2 months. If you are going to freeze the crusts, let them chill down in the refrigerator for at least a few hours before freezing. This will help prevent ice crystals from forming. The crusts can be topped directly from the refrigerator or freezer and baked off. It will take just a couple of minutes longer in the oven. A toaster oven will work as well; just be sure to place the crust on a sheet of parchment or foil in a baking pan, not directly on the toaster rack.
Notes
Nutritional info*:
- 6" Pizza Crust: 234 cal, 19 g total fat (72%), 5.8 g total carbs, 2.8 g fiber, 3 g net carbs, and 12 g protein.
- 6" Italian Veggie Pizza: 482 cal, 40 g total fat (69%), 12.2 g total carbs, 4.3 g fiber, 9.9 g net carbs, and 22 g protein.
- 6" BBQ Pork Pizza: 470 cal, 36 g total fat (68%), 7.9 g total carbs, 3 g fiber, 4.9 g net carbs, and 30 g protein.
*I use Living Cookbook 2015, along with package information and data from www.nutritiondata.self.com, to calculate the nutritional information for my recipes. Thus, I can make no guarantees as to the accuracy.
No comments:
Post a Comment